Wallet
wallet คืออะไร?
crypto wallet คือ digital wallet ที่ใช้ติดต่อกับ blockchain เพื่อ sign, verify, และส่ง transactions ในปัจจุบันมี crypto wallet solutions มากมายในตลาด, ตั้งแต่ simple-to-use web apps จนไปถึง hardware security solutions ที่ซับซ้อน.
Social Logins บน Solana
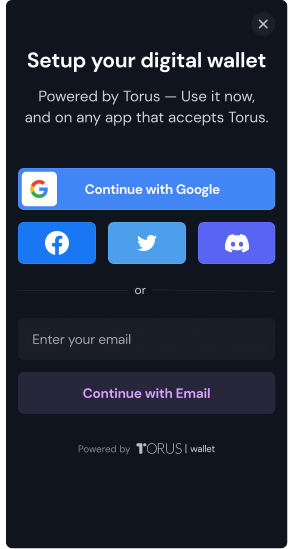
Web3Auth ทำให้ users สามารถ sign in โดยใช้ Web2 OAuth Providers(Facebook, Google, Twitter etc.) ที่มีอยู่แล้วไปยัง Web3 dapps. มันจะใช้งายง่าย และใช้วิธี non-custodial เพื่อจัดการ assets และ identity. มันทำให้ technical barriers ลดลง และลดการเรียนรู้เรื่อง digital ownership สำหรับ users ทุกคนโดยซ่อนการจัดการ private key ไว้
แนวทางการ Integration
ในตัวอย่างนี้จะเป็นแนวทางง่ายๆ ในการ integrate social logins เข้าไปใน dapp ของเรา
การติดตั้ง Dependencies
เริ่มโดยใช้ wallet ที่มี dapp, เราสามารถลง @toruslabs/solana-embed. โดยใช้ package managers ต่างๆ เช่น yarn และ npm เพื่อติดตั้ง.
yarn add @toruslabs/solana-embed
npm install --save @toruslabs/solana-embed
การใช้ SDK และ initialize
ในตัวอย่าง code สั้นๆ ด้านล่าง เราจะสร้าง instance ของ solana-embed แล้ว init มันด้วย testing environment ที่ใช้ solana testnet. เราสามารถส่งค่าตัวเลือกเพื่อ config ในระหว่าง init wallet interface. เราสามารถอ่าน solana-embed api-reference เพื่อเรียนรู้เพิ่มเติม
import { clusterApi, Connection } from "@solana/web3.js";

import Torus from "@toruslabs/solana-embed";

(async () => {
  const torus = new Torus();

  await torus.init({
    buildEnv: "testing", // uses solana-testing.tor.us (which uses testnet)
    enableLogging: true, // default : false
    showTorusButton: true, // default: true
  });
})();
const torus = new Torus();

await torus.init({
  buildEnv: "testing", // uses solana-testing.tor.us (which uses testnet)
  enableLogging: true, // default : false
  showTorusButton: true, // default: true
});
Trigger user login
เราสามารถเรียก torus.login() เพื่อ trigger การ login ที่ไหนก็ได้ที่ต้องการใน app การเรีนก login method โดยไม่ส่ง parameter มาด้วยจะเป็นการเปิด modal ให้ user เลือกตัวเลือก logins ที่มีอยู่

หลังจาก login สำเร็จ method จะคืนค่า array ของ public keys มา โดย element แรกของ array คือ wallet public key ปัจจุบัน
(async () => {
  const publicKeys = await torus.login(); // return array of public key in base 58
  const publicKey = publicKeys[0];
})();
const publicKeys = await torus.login(); // return array of public key in base 58
const publicKey = publicKeys[0];
การช้ torus instance เพื่อดึงข้อมูลรายละเอียด user account
torus instance จะมี interface สำหรับ sign transactions และ messages ใน logged-in state. และมันยังมี interface สำหรับเข้าถึงข้อมูล user login เช่น email, profile image ฯลฯ. (ขึ้นอยู่กับ login method)
(async () => {
  const userInfo = await torus.getUserInfo(); // user profile info (email address etc)
})();
const userInfo = await torus.getUserInfo(); // user profile info (email address etc)
การใช้ Torus Solana API เพื่อ sign message.
ในการส่ง message ให้ user sign, web app ต้องให้ UTF-8 encoded string เป็น Uint8Array.
ทุกๆ ครั้งที่ user ต้องการ sign message, wallet จะเปิดหน้าต่างยืนยันขึ้นมา
(async () => {
  const msg = Buffer.from("Test Signing Message ", "utf8");
  const signed_message = await torus.signMessage(msg);
})();
const msg = Buffer.from("Test Signing Message ", "utf8");
const signed_message = await torus.signMessage(msg);
เช่นกัน, เราสามารถใช้ methods signTransaction และ signAllTransactions บน torus instance เพื่อ sign single, multiple transactions ตามลำดับ.
การใช้ torus Solana API เพื่อส่ง transaction.
การส่ง transaction ทำได้ง่ายไ ด้วยการเรียก method sendTransaction บน torus instance และส่ง Transaction เข้าไปด้วย
wallet จะเปิดหน้าต่างยืนยัน หลังจากยืนยันแล้ว SDK ก็จะ signs และส่ง transaction ไปที่ chain.
(async () => {
  const network = "";
  const connection = new Connection(network);
  const blockhash = (await conn.getRecentBlockhash("finalized")).blockhash;

  const destPublicKey = "<destination public key>";
  const transactionInstruction = SystemProgram.transfer({
    fromPubkey: new PublicKey(publicKey),
    toPubkey: new PublicKey(destPublicKey),
    lamports: 0.1 * LAMPORTS_PER_SOL,
  });
  const transaction = new Transaction({
    recentBlockhash: blockhash,
    feePayer: new PublicKey(publicKey),
  }).add(transactionInstruction);

  const res = await torus.sendTransaction(transaction);
})();
const transactionInstruction = SystemProgram.transfer({
  fromPubkey: new PublicKey(publicKey),
  toPubkey: new PublicKey(destPublicKey),
  lamports: 0.1 * LAMPORTS_PER_SOL,
});
const transaction = new Transaction({
  recentBlockhash: blockhash,
  feePayer: new PublicKey(publicKey),
}).add(transactionInstruction);

const res = await torus.sendTransaction(transaction);
Top-ups
ในตอนนี้ API สนับสนุนการเติมเงินจาก Moonpay
(async () => {
  const paymentStatus = await torus.initateTopup("moonpay");

  // topup with custom address
  const paymentStatus = torus.initateTopup("moonpay", {
    selectedAddress: "< Recipient's Solana Public Key(base58) >",
  });
})();
const paymentStatus = await torus.initateTopup("moonpay");

// topup with custom address
const paymentStatus = torus.initateTopup("moonpay", {
  selectedAddress: "< Recipient's Solana Public Key(base58) >",
});
Logout
การ logout user ทำได้โดยการเรียก function logout บน torus wallet instance.
(async () => {
  await torus.logout();
})();
await torus.logout();